

I have thousands of different electronic components placed somewhere in the drawer in my LAB. Finding a particular part in boxes with mixed SMD tapes is a total nightmare, it is even worse when you need to find a particular capacitor (as you know they are not marked like resistors). Because of this I have came up with an idea to design and make this SMD Parts Organizer.
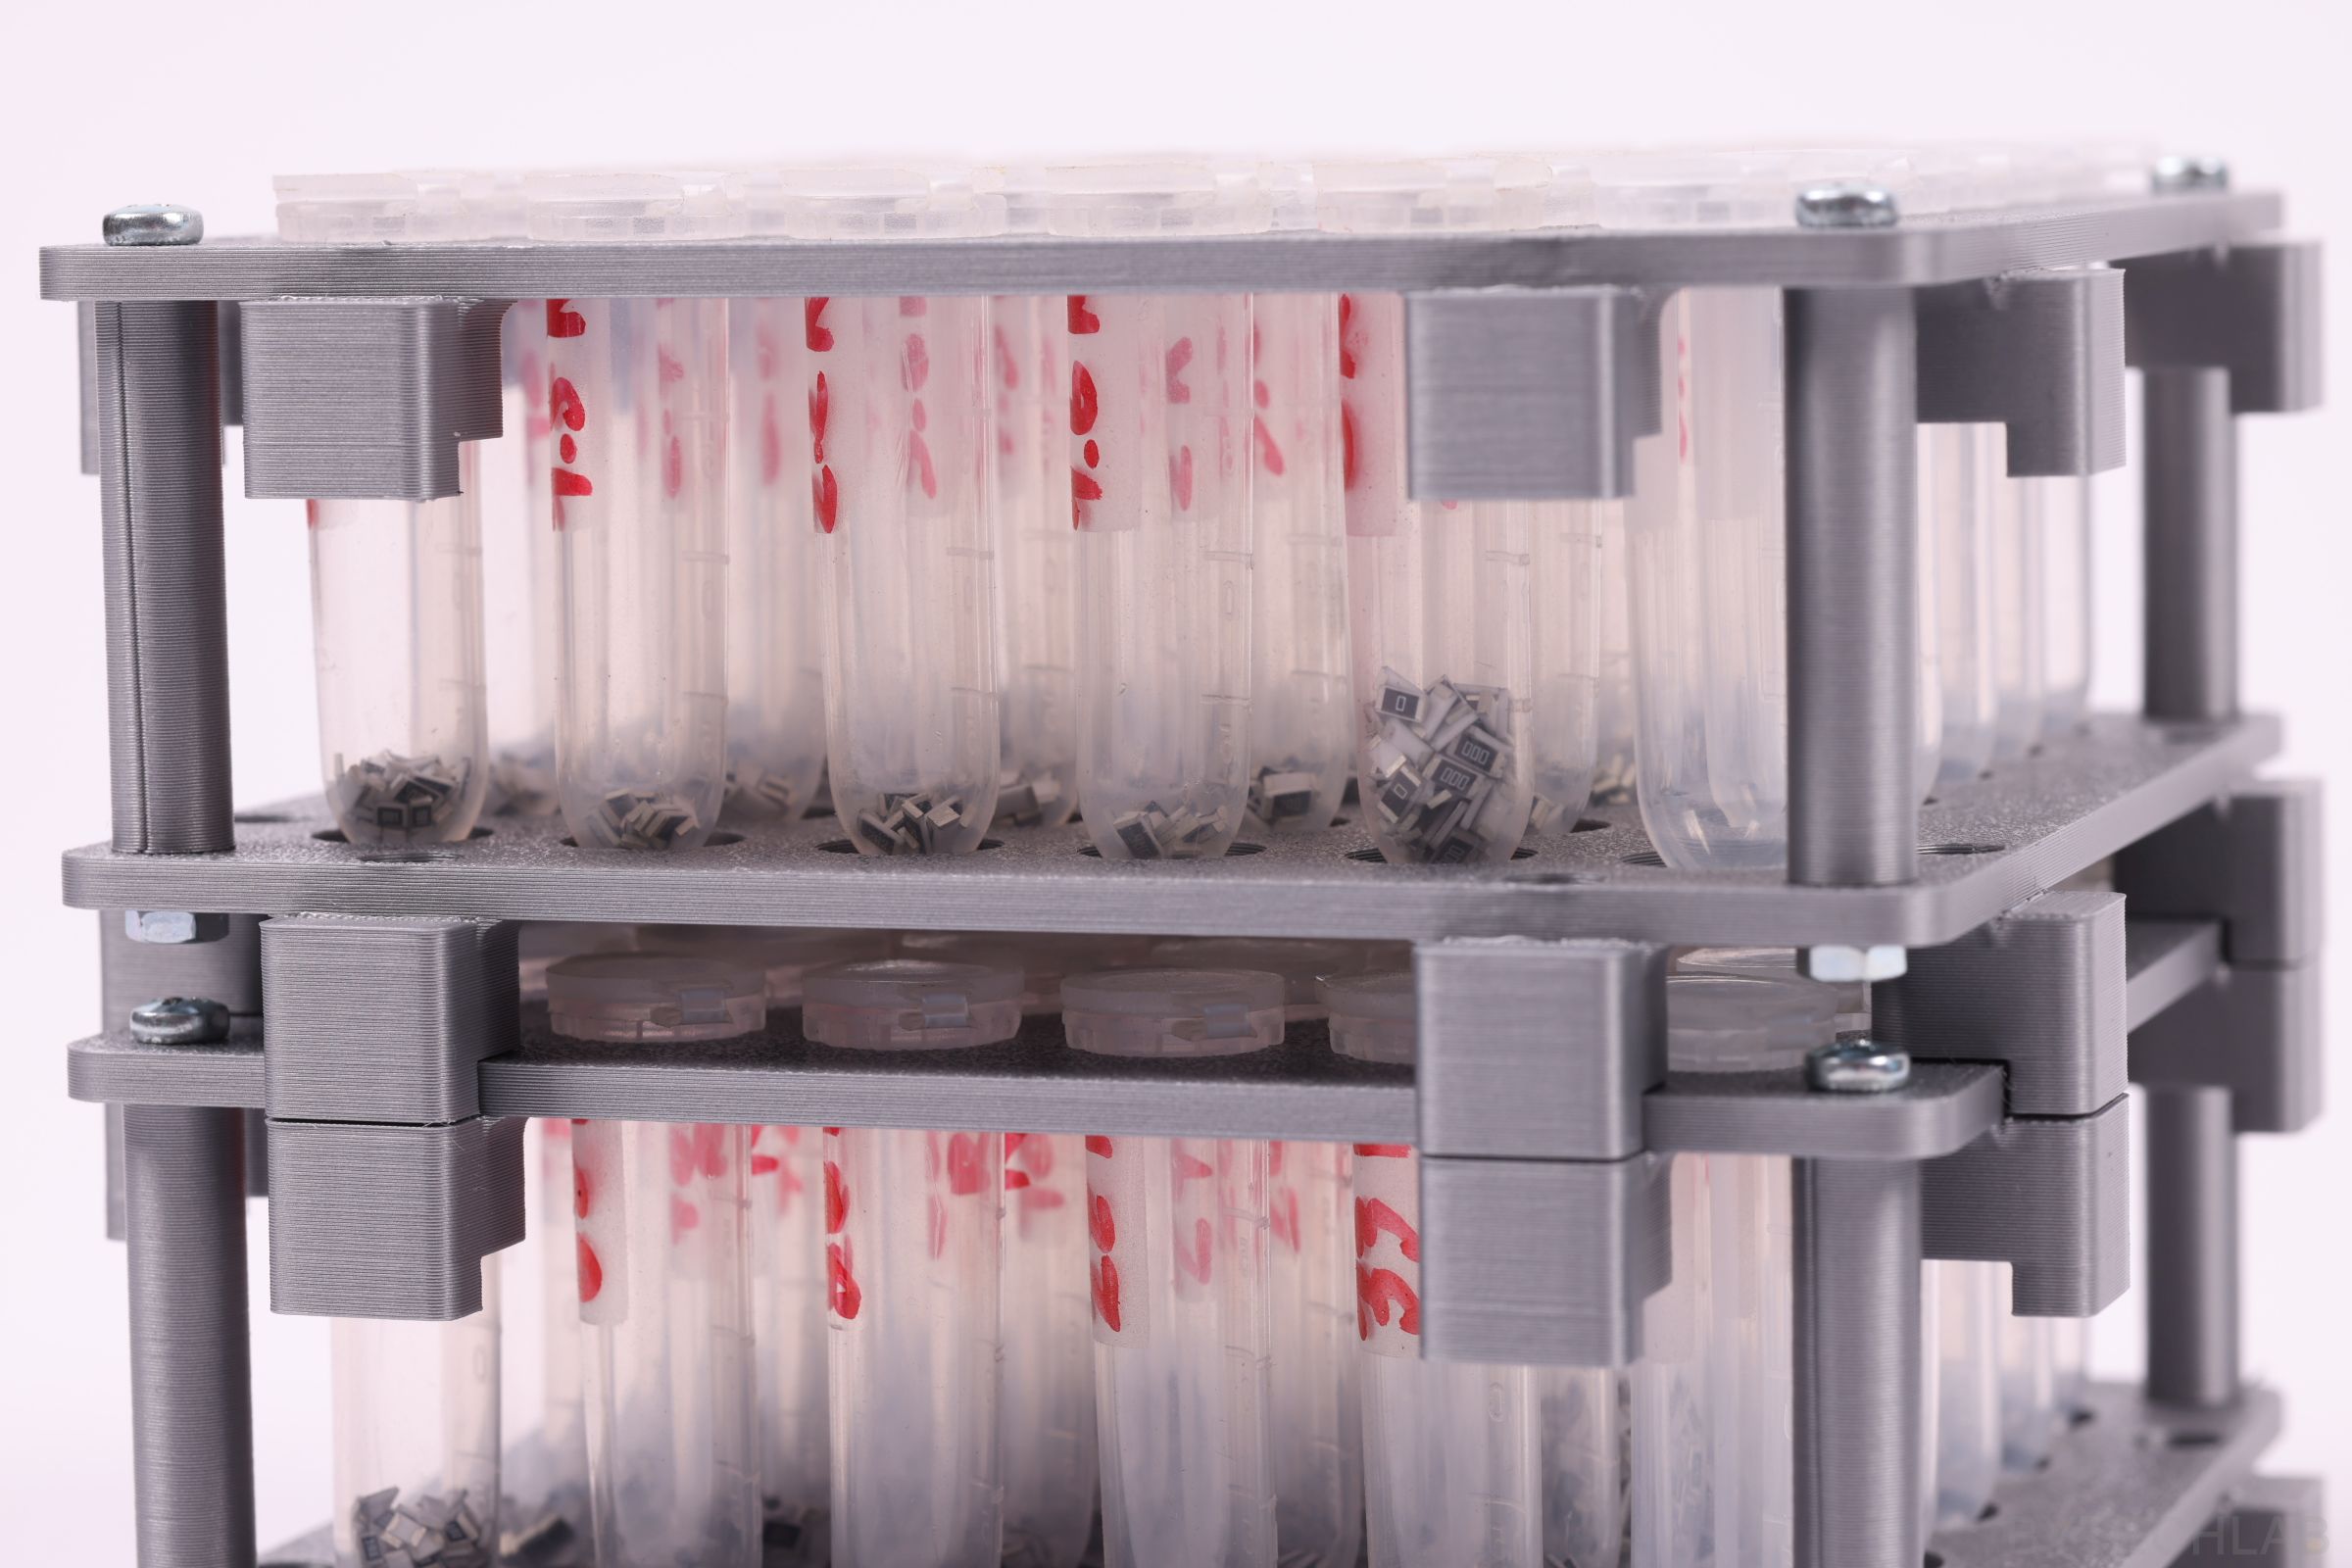
The organizer is stackable – it it is always easy to access and it doesn’t take up valuable desk surface. It uses neodymium magnets to hold the whole stack of organizer modules together.
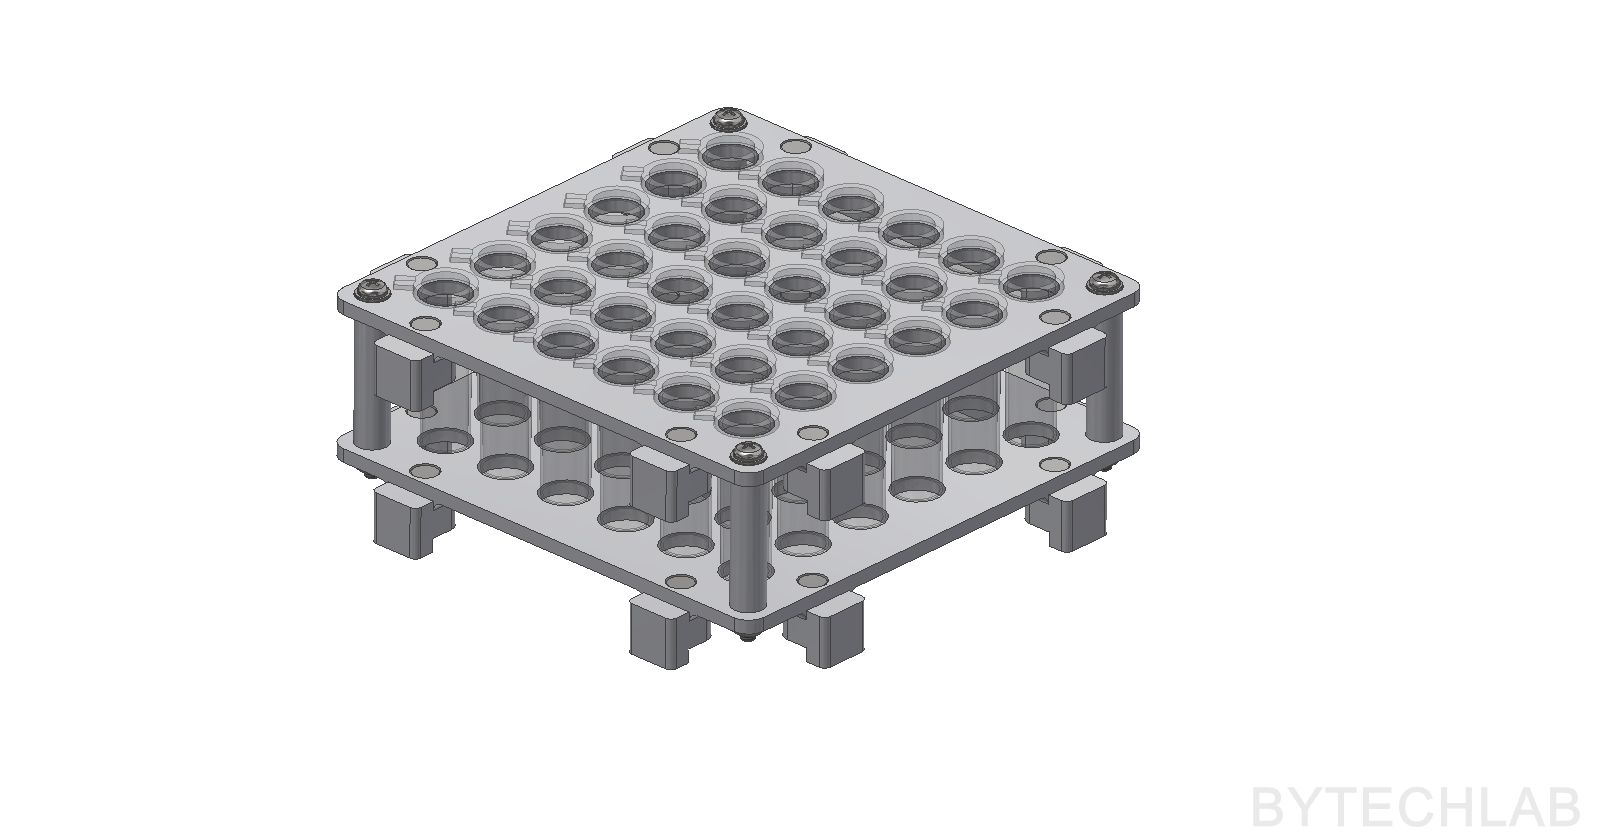
I have decided to use the popular 2 ml Eppendorf test-tubes with plastic hinges (they are very cheap, 200 pcs. for about one dollar, link: https://www.eppendorf.com/gb-en/Products/Laboratory-Consumables/Tubes/Eppendorf-Safe-Lock-Tubes-p-0030121597). A few hundred SMD parts in the 1206 package should fit to one test-tube without any problem . Each organiser module is capable of holding 36 test-tubes.
Below I will describe the entire process of building such SMD Parts Organizer so that you can make one by yourself.
MCAD DESIGN & 3D PRINTING
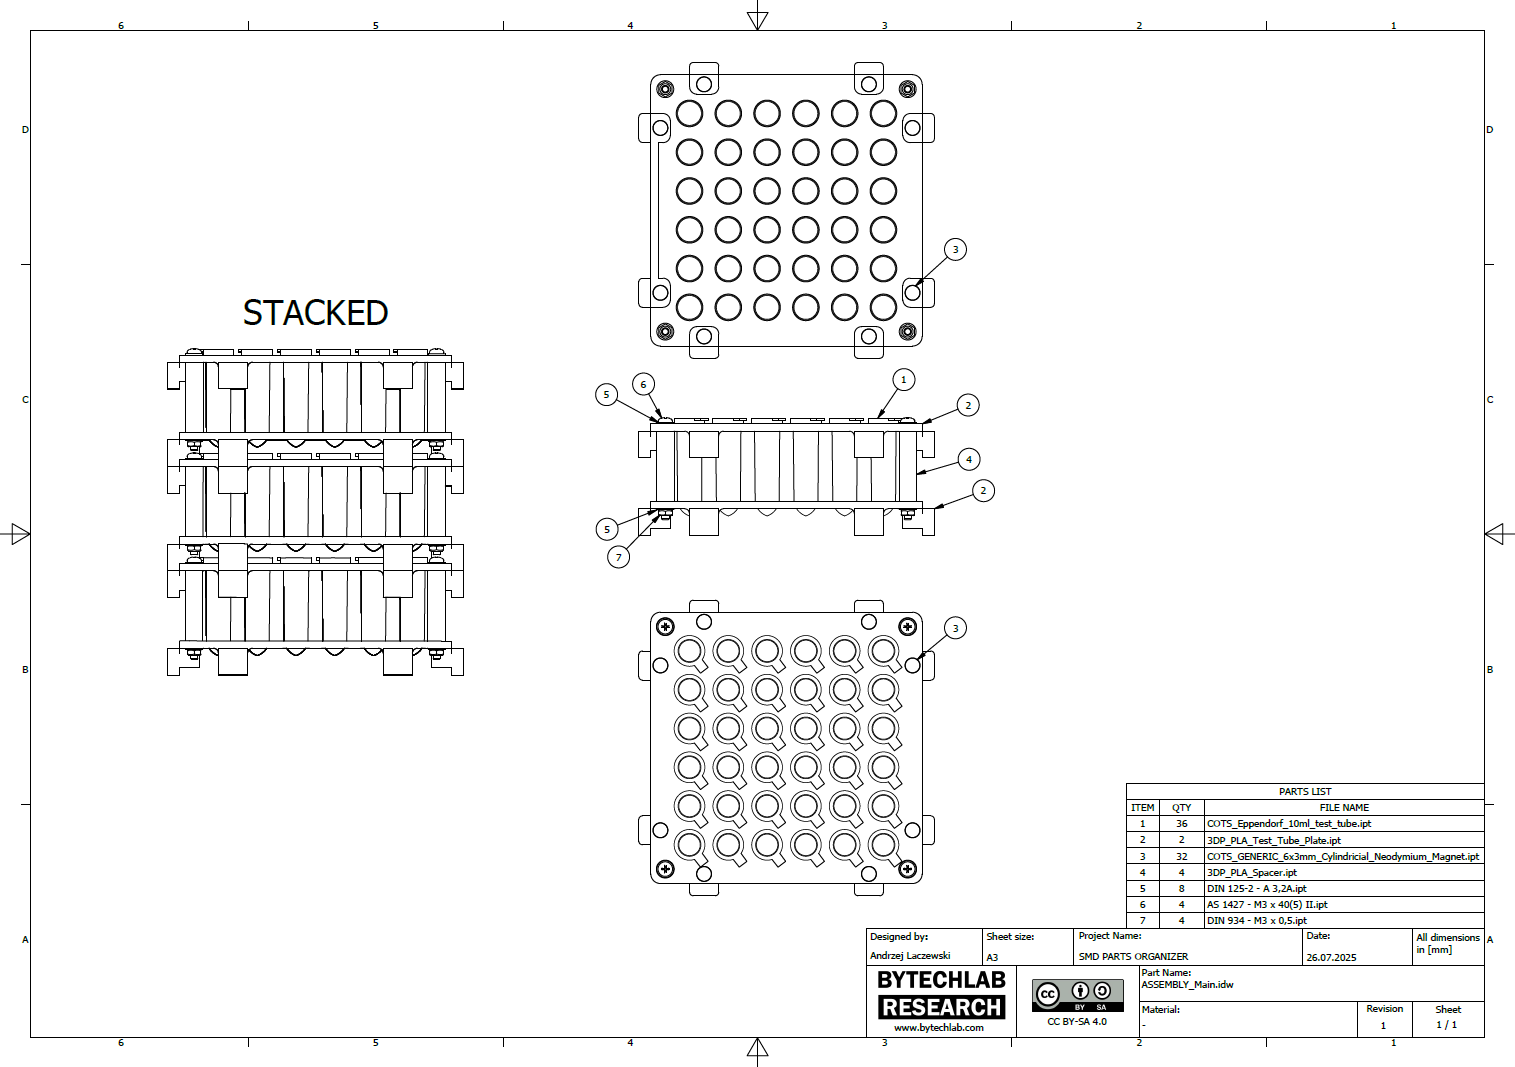
Mechanical parts were designed in Autodesk Inventor. All parts were optimized for FDM 3D printing.
In the GitHub repository (MCAD folder) you can find the following files:
- Autodesk Inventor project,
- Exported STL files for 3D printing,
- Exported STEP file of the whole assembly,
- Exported PDF file with assembly drawing, BOM and assembly instructions,
- Exported assembly renders,

Recommended printing settings:
- 0.2 mm layer height,
- PLA filament,
- 30 % rectilinear infill,

MORE PHOTOS


LINKS TO .STL & .STP FILES
- GRABCAD: https://grabcad.com/library/smd-parts-organizer-fixed-on-the-wall-with-double-sided-tape-10-ml-test-tube-version-1
- THINGIVERSE: https://www.thingiverse.com/thing:2405377