
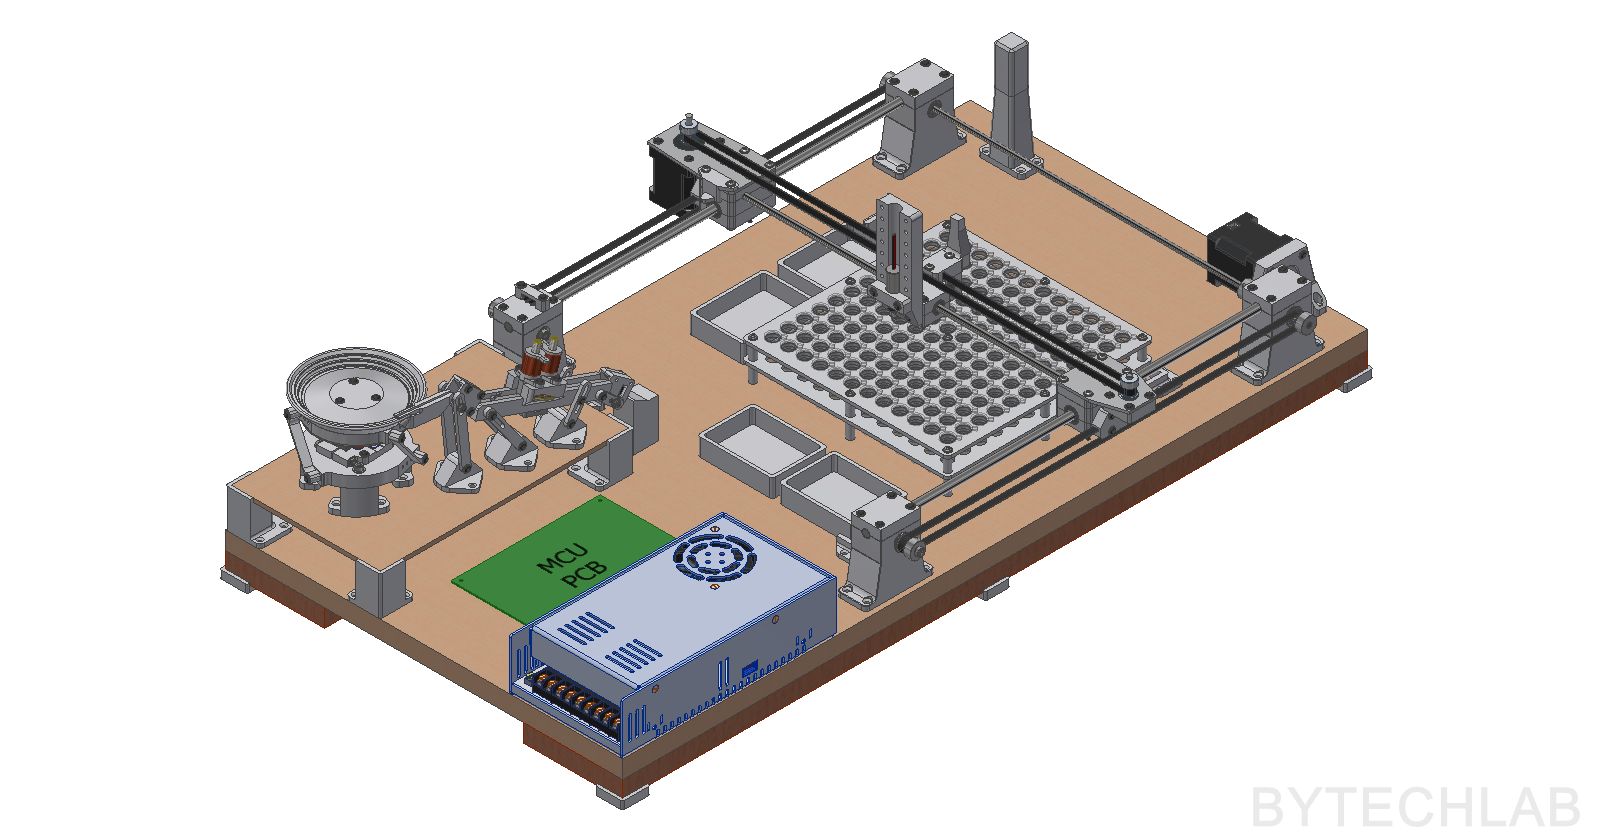
The idea behind SMD Parts Sorting Machine is to completely automatically sort some random SMD parts by their size, shape, type, and most importantly their value and other parameters (resistance, capacitance, ESR etc.). The whole machine may find use in searching some “perfect” parts that have to meet some design requirements.
For example you may want to find a resistor that has exactly 10k Ohm of resistance not more or less. Some analog stuff might need precisely chosen components. You can throw some 10k resistors into the bowl feeder and program the whole machine in such a way that it finds part value that you need (as you know resistors and other parts have some tolerances for ex. 10%). Parts that doesn’t meet your expectations will be thrown to the trash tray or somewhere else, possibilities are almost endless.
You can also use this machine if you accidentally mix some SMD capacitor values together and you don’t really know which is which (as you might know they are not marked like the resistors). So, instead of measuring each one by hand you can throw them to this machine and wait for the sorting process to be completed.
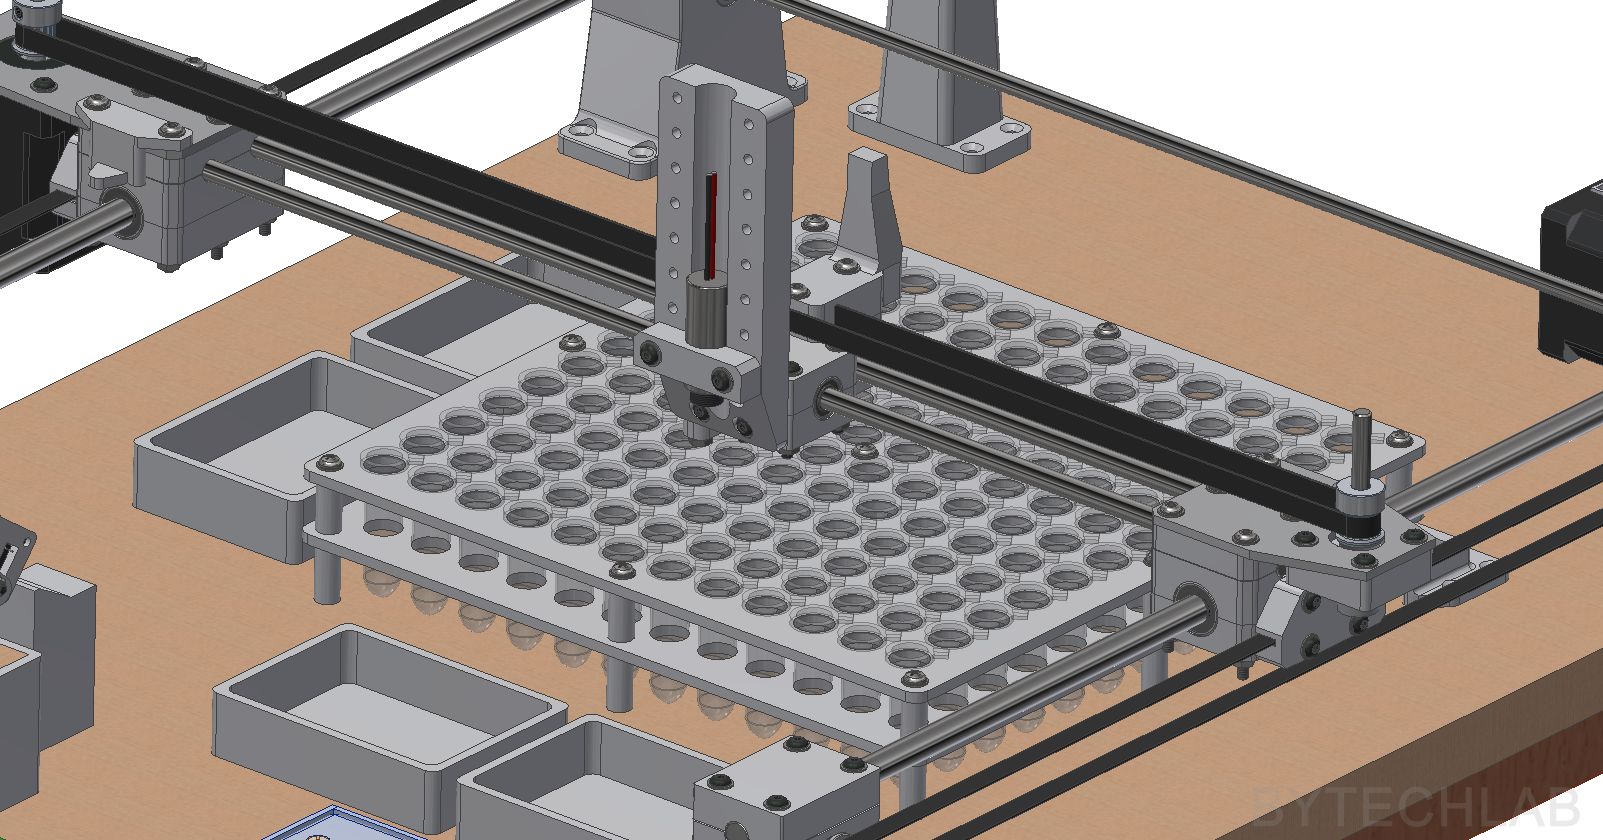
This machine will be able to sort up to 144 different part values (that much test tubes fit into the array). I will probably write a PC application that will allow you to program the whole thing easily via USB. This project is not finished yet. I will probably publish one more sub-article describing the MCB (main controller board) and the X/Y axis assembly itself.
LINKS TO THE SUB ARTICLES:
You can find all links to the sub-articles of this project down below (just to organize everything). For now I’ve written only two sub-articles:
- DIY Bowl Feeder (for 1206 SMD parts)
- Measurement Rail For SMD Parts
- Main Controller Unit [in progress]
- SMD Parts Sorting Machine [in progress]
MCAD DESIGN
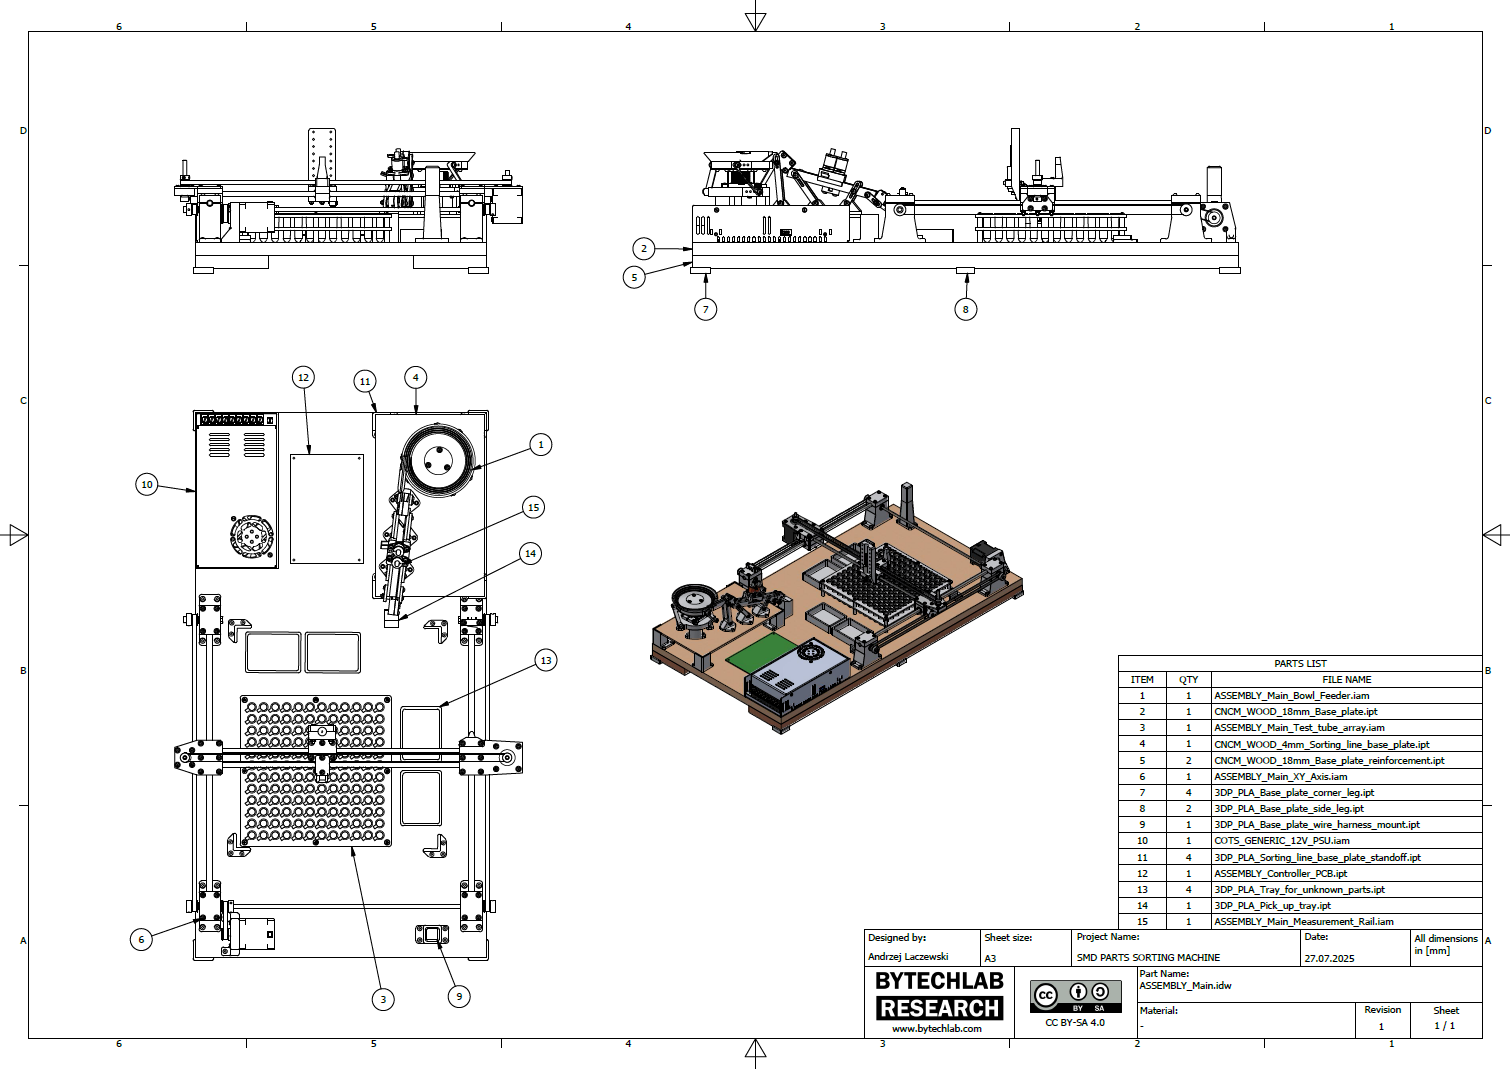
Mechanical parts were designed in Autodesk Inventor. All parts were optimized for FDM 3D printing.
In the GitHub repository (MCAD folder) you can find the following files:
- Autodesk Inventor project,
- Exported STL files for 3D printing,
- Exported STEP file of the whole assembly,
- Exported PDF file with assembly drawing, BOM and assembly instructions,
- Exported assembly renders,
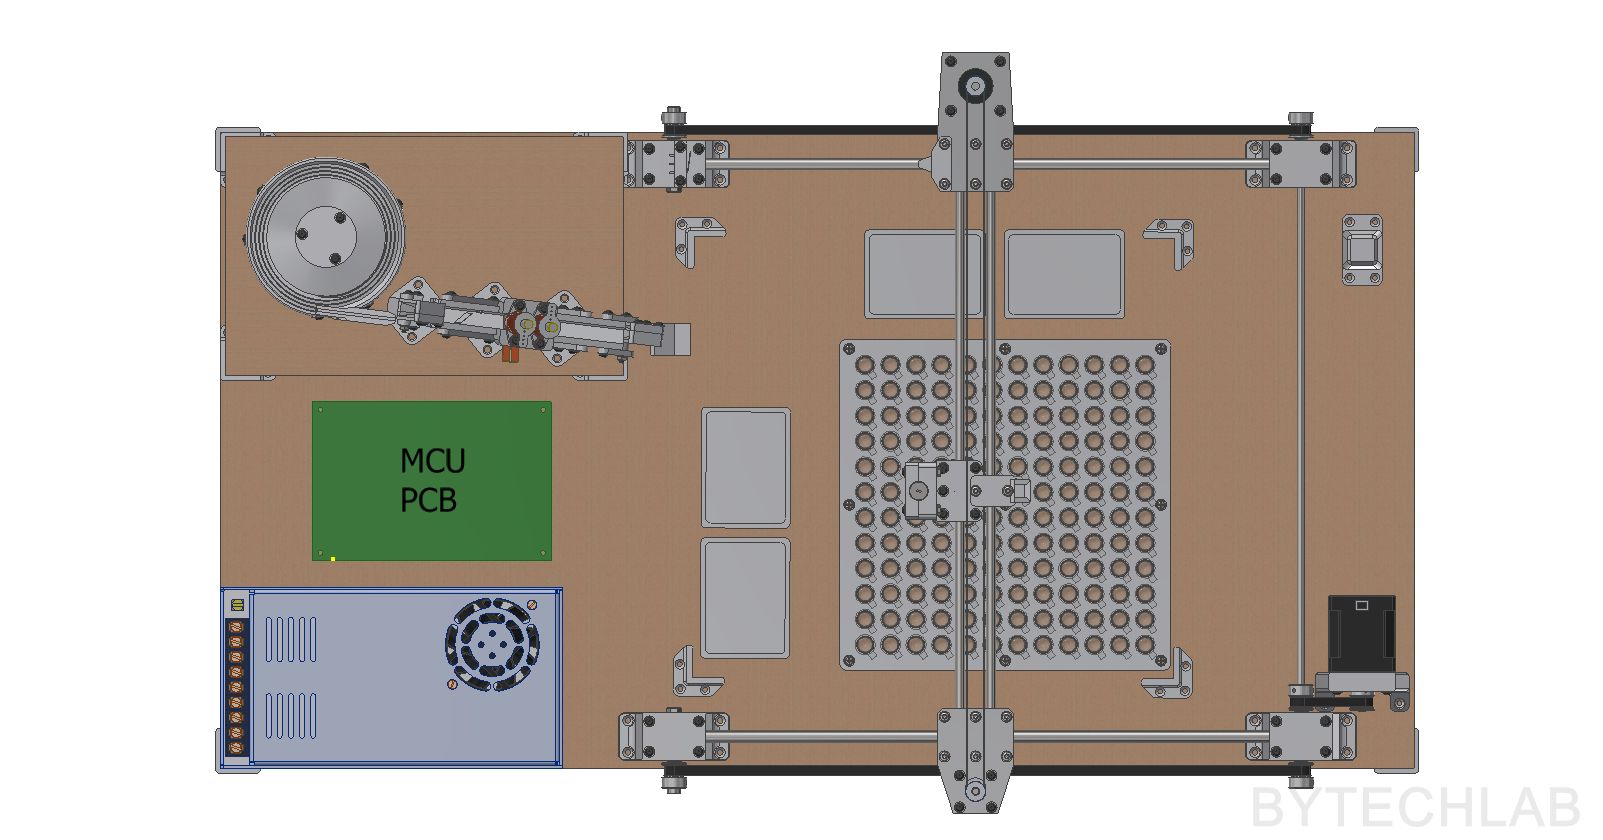
HOW WILL IT WORK?
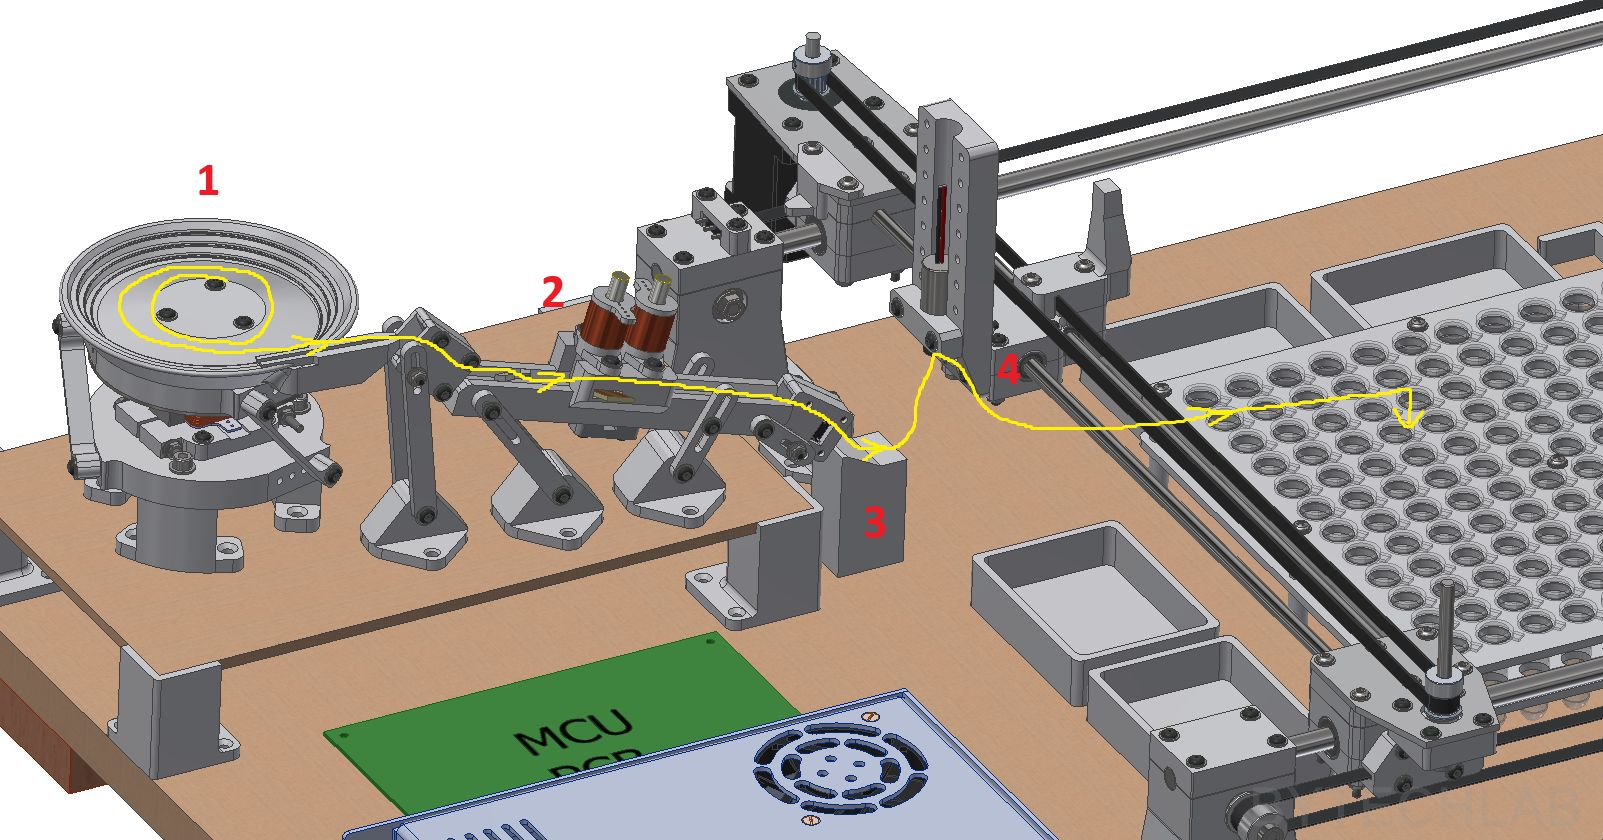
The whole part sorting process proceeds in the following steps:
- Firstly, you will need to put some parts in to the bowl feeder [1]
- After tuning on the whole machine ,bowl feeder starts to “shake”and feed them to the measurement rail
- SMD parts fall one by one from the bowl feeder to the measurement rail (one at a time) [2]
- Measurement is being taken (described in previous article) [2]
- When MCB knows exact parameters of a given part 2 linear actuators lift up and the part slides down to the “pick up tray” [3]
- X axis carriage with a powerful and precise electromagnet [4] arrives to the “pick up tray” [3]
- Measured part sticks to the electromagnet
- The manipulator moves the part over the desired test-tube/container as programmed before
- Electromagnet turns off and the part drops into that particular test tube
- The whole process repeats again with another part
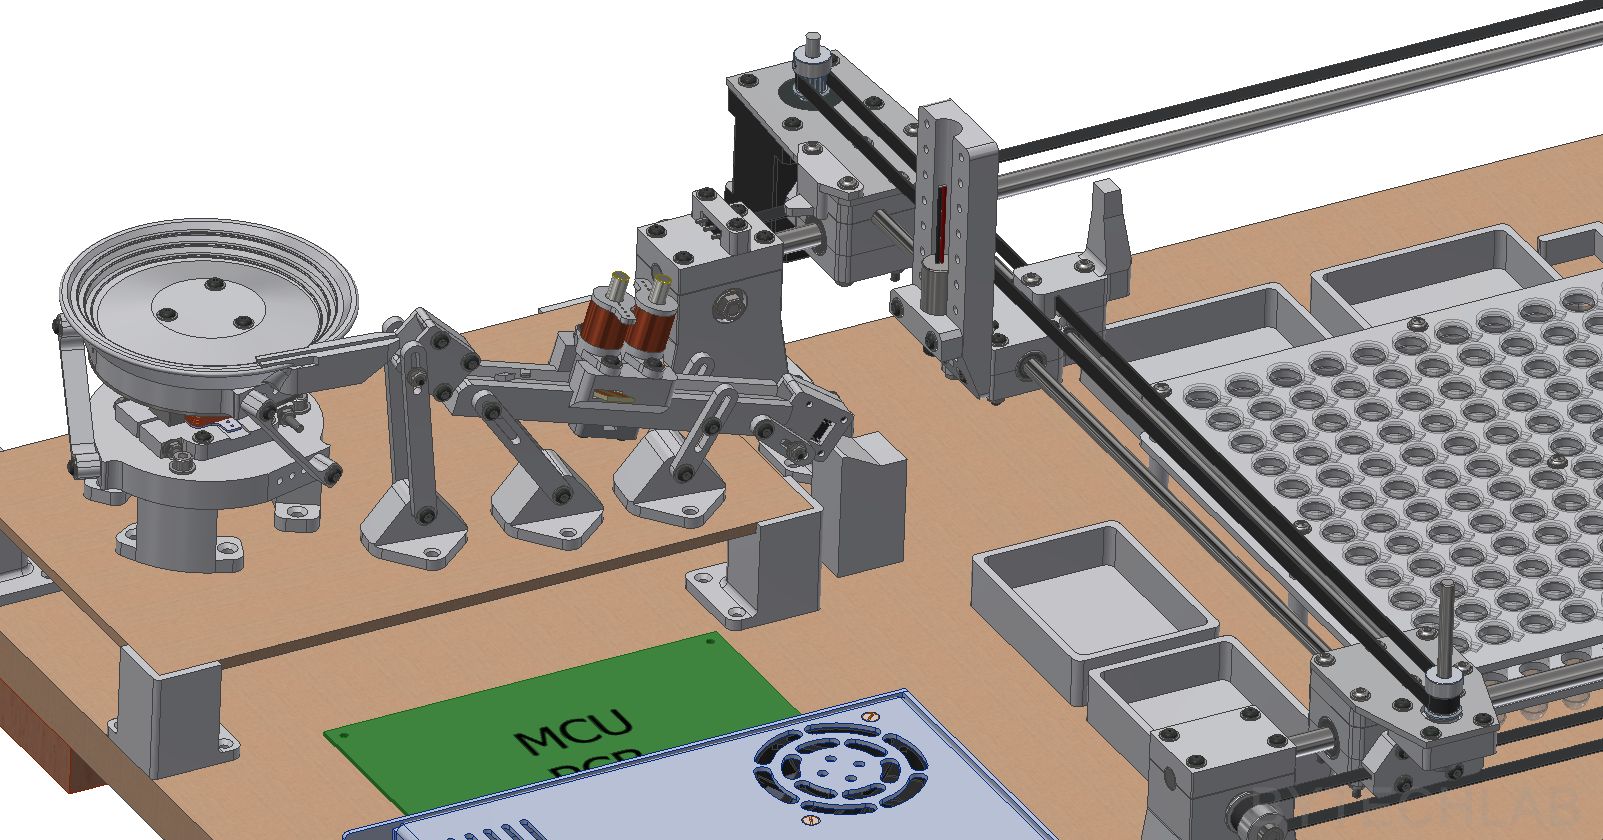
MORE RENDERS
You can see some early design renders of the SMD Parts Sorting Machine below (a lot of stuff that you see on them might change in the near future):
WORK LOG:
- EDIT: 06.08.2018:
To be continued ……….